What to Expect During Roof Installation: A Complete Timeline for CT and NY Homeowners
When you see a roofing truck pull into your driveway with ladders stacked high and a massive dumpster trailing behind, that familiar knot of anxiety starts to form. How many days will your morning coffee routine be interrupted by hammering overhead? Will your neighbors complain about the noise? Most importantly, when can you stop worrying about whether your car will get dinged by falling debris or whether your prized garden will survive being trampled?
Connecticut and New York homeowners face unique roof installation challenges that go beyond what families in milder climates experience. Your new roof needs to handle heavy snow loads, ice dam formation, and the relentless freeze-thaw cycles that can destroy inferior installations. The good news is that professional roofing contractors follow a predictable sequence from initial inspection through final cleanup, typically compressing the most disruptive phases into just one to three focused workdays on average single-family homes. While weather delays or unexpected structural issues can extend the overall project calendar, understanding each phase of the process helps you prepare your family, protect your property, and know exactly when your yard will return to normal.
Key Takeaways
- Typical projects finish in one to three workdays: Most CT and NY single-family roofs are stripped, re-roofed, and cleaned up within one to three good-weather days, with the messiest disruption concentrated during the tear-off phase when old materials come down.
- Tear-off creates the most visible mess: Your property looks most disrupted when old shingles, nails, and underlayments are removed and staged for disposal, but this phase moves quickly into dry-in and cleanup to minimize your home’s exposure.
- Weather and safety guidelines protect your investment: Professional contractors avoid opening more roof than they can secure the same day, which protects both your home’s interior and your yard from unnecessary damage during unpredictable weather.
- Quality standards reduce future disruptions: HUD and FHA roof standards expect sound, leak-free installations with reasonable remaining life, so thorough replacements and necessary repairs now reduce the chance your yard becomes a construction zone again soon.
- Professional cleanup is part of the scope: Homeowner materials emphasize debris removal and magnetic nail sweeps so driveways and lawns return quickly to safe, normal use rather than being left scattered with roofing hazards.
Understanding the Roof Installation Process in CT and NY
Roof replacement in Connecticut and New York goes far beyond simply swapping out worn shingles for fresh ones. Federal housing guidance emphasizes that roof work should restore a watertight, durable covering that prevents moisture entry and provides reasonable future utility, which is why contractors often recommend full replacement when existing roofs near the end of their useful life.
Your local roof environment presents specific challenges that influence how contractors approach installations. In cold climates, ice dams and snow loads make proper roof covering, insulation, and attic ventilation essential to long-term performance. A roof that might last 25 years in Florida could fail in 15 years in Connecticut if not properly designed for freeze-thaw cycles and winter moisture control.
Rehab guidelines often rank roofing as a high priority because leaks can damage framing and interior finishes throughout your home. This is why professional contractors treat roof replacement as a major, bounded project that supports other improvements rather than a quick cosmetic fix. When done correctly, a comprehensive roof replacement addresses not just the visible shingles but also the critical water barriers, ventilation systems, and structural components that keep your home protected year-round.
The process may feel overwhelming when crews arrive with equipment and materials, but each step serves a specific purpose in creating a durable, weather-resistant system. Understanding why certain phases take the time they do helps you appreciate that those one to three focused workdays are actually protecting your largest investment.
National vs. CT/NY Installation Timelines
Across the country, many residential roof replacements are completed in one to three workdays, depending on roof size, existing layers, and complexity. In Connecticut and New York, winter storms, shorter daylight hours, and freeze-thaw cycles affect which specific days contractors choose to work, but the on-site production window for straightforward jobs remains similar to national averages.
Several factors influence whether your project lands on the shorter or longer end of that timeline range. A typical one or two-story single-family home with one or two shingle layers can often be stripped, inspected, and re-roofed in one long day or two standard days. Extra time gets added if damaged sheathing is discovered during tear-off, which sometimes happens with older roofs that have experienced long-term leaks.
Larger homes, multiple existing layers, steep pitches, or complex architectural details like valleys and dormers can extend the job by another day or more. However, the “yard torn up” appearance remains concentrated in consecutive workdays rather than dragging out over weeks. Contractors plan material deliveries and crew scheduling to maintain continuous progress once work begins.
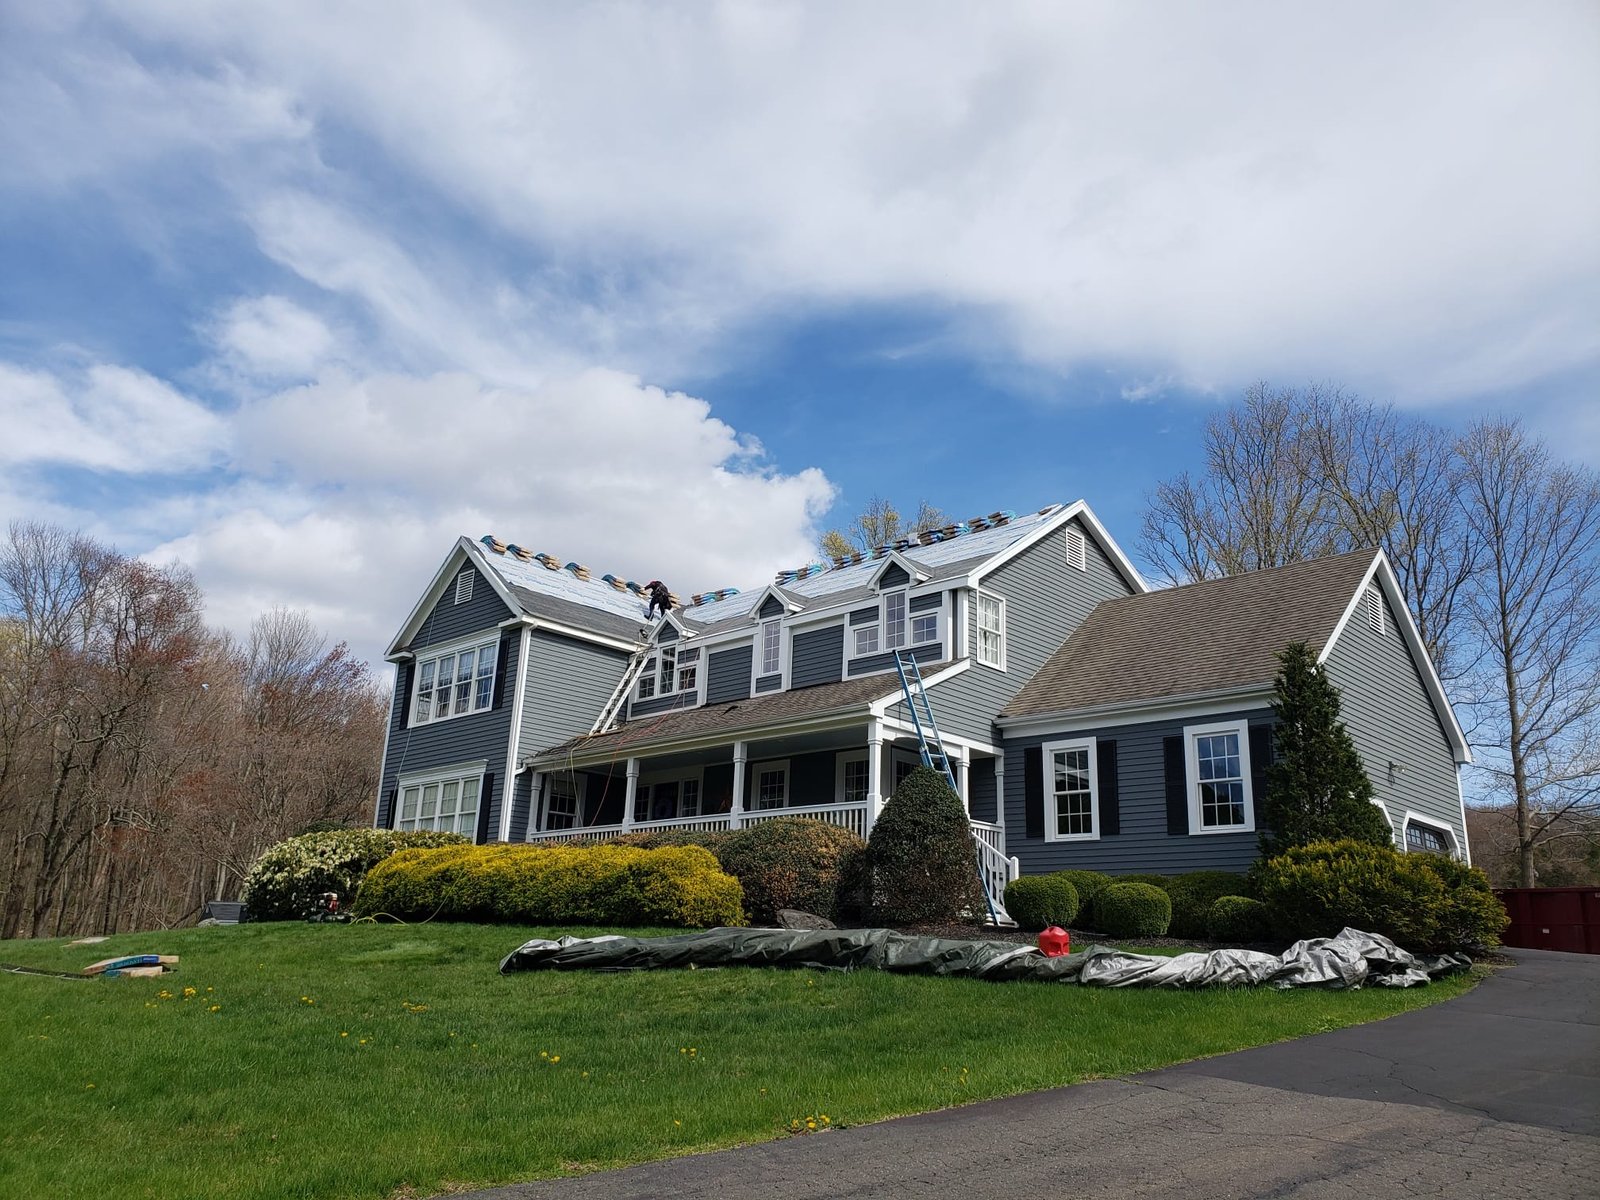
Day one usually brings the biggest disruption to your property. Expect the dumpster and material delivery, protective tarps over landscaping, full or partial tear-off of old materials, and early installation phases, all followed by initial cleanup efforts. The second and third days typically cover completing installation, handling flashing and ventilation details, and conducting thorough debris removal with magnetic nail sweeps so your driveway and yard return quickly to normal use.
This compressed timeline benefits homeowners in several ways. Shorter project windows mean less disruption to daily routines, reduced exposure of your home’s interior to the elements, and lower risk of weather-related complications mid-project. When contractors can focus their crews and complete work efficiently, everyone benefits.
Key Steps in the Roof Installation Process
A roof installation follows predictable phases that homeowners can track from ground level, which helps answer the constant questions of “what’s happening now?” and “how long will this phase last?”. Understanding each step also clarifies when your yard will look messiest versus when most work happens up on the roof away from your living areas.
Inspection, Planning, and Protection
Before any materials get removed, professional contractors conduct thorough inspections. Roof and attic guidance instructs appraisers and inspectors to visually examine roofs for deficiencies that pose health and safety hazards or fail to provide reasonable future utility. This assessment informs the scope of work and helps identify potential problems before tear-off begins.
Smart contractors spend time planning access routes, staging equipment locations, and deploying protective measures before heavy work starts. Homeowner materials stress using tarps or coverings to protect siding, shrubs, and walkways from falling debris. This preparation phase may feel slow, but it prevents damage to landscaping and structures that would cost more to repair later.
You might notice crews carefully placing plywood sheets over air conditioning units, covering delicate plants with heavy tarps, and positioning dumpsters to minimize interference with your driveway access. These details matter because they determine how much secondary cleanup and repair you’ll face after the roof work finishes.
Tear-Off, Sheathing Repairs, and Underlayment
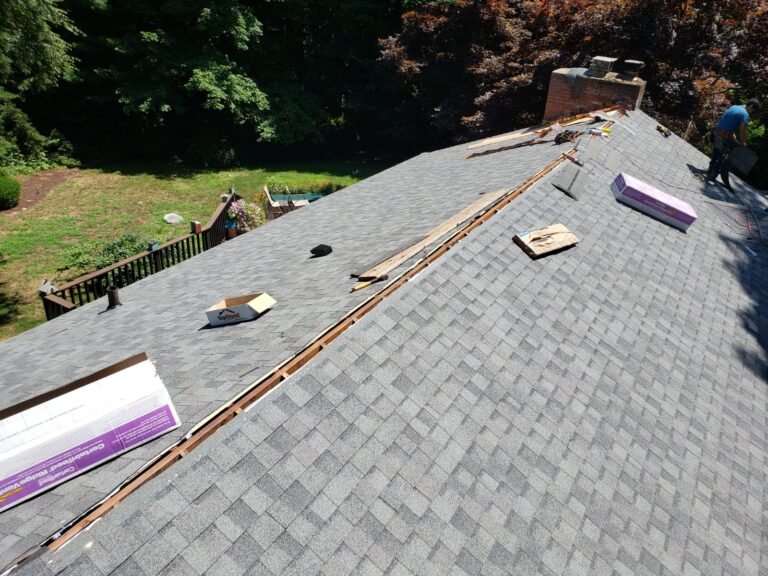
The tear-off phase creates the most dramatic visual impact on your property. When multiple layers exist and defects are present, HUD guidance calls for stripping down and correcting problems rather than simply covering them with new materials. This makes tear-off the most visibly disruptive but crucial step in the entire process.
During tear-off, old shingles, felt paper, and sometimes damaged wood decking come sliding down into dumpsters or onto tarps spread across your lawn. The noise level peaks during this phase, and your yard temporarily fills with dust and small debris. However, professional crews work systematically to contain mess and keep the tear-off area organized rather than scattering materials everywhere.
Once old materials are removed, contractors inspect the roof deck carefully. Roof repair manuals describe replacing or drying any damaged sheathing before installing underlayments and water-resistant barriers. This creates a continuous shield under the finished roofing that protects against wind-driven rain and ice dam leakage.
The underlayment phase often moves quickly once sheathing repairs are complete. Modern synthetic underlayments install faster than old-style felt paper and provide superior protection if weather interrupts the job. You’ll see crews working methodically across the roof surface, rolling out materials and fastening them according to manufacturer specifications.
Installing Shingles and Roof Components
With a sound base established, new shingles or other roofing materials go on following manufacturer requirements and local building standards. Professional installation ensures materials can resist local wind and weather conditions that are specific to the Northeast climate.
Simultaneously, contractors upgrade or reset flashings around chimneys, vent pipes, and wall intersections. Attic ventilation gets checked or improved to help control moisture, prevent ice dams, and extend overall roof durability. These detail-oriented tasks take time but prevent the common failure points that cause leaks in otherwise sound roofs.
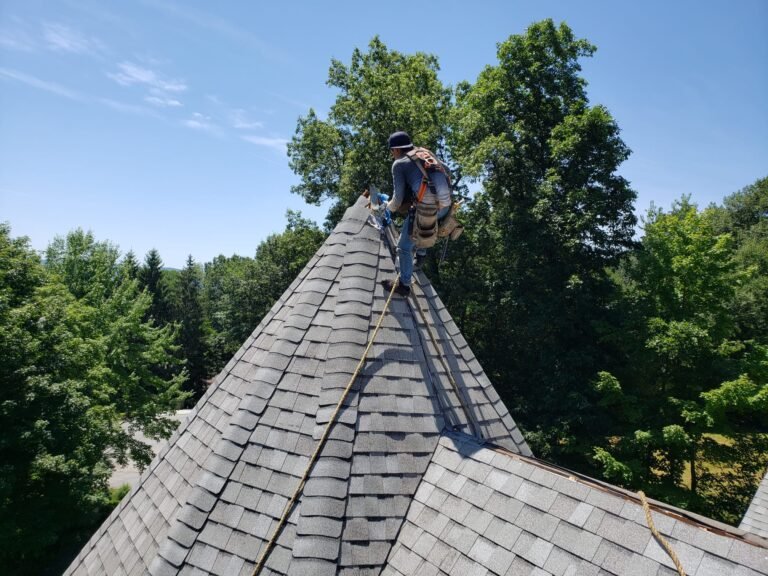
From your perspective on the ground, the installation phase looks less chaotic than tear-off but remains active and noisy. You’ll hear nail guns firing rhythmically as crews work their way across roof sections. The visual transformation happens quickly once installation begins, with your home’s appearance improving dramatically as fresh shingles replace worn, damaged materials.
Professional installers pay close attention to proper shingle alignment, fastener placement, and sealing techniques. These details might not be visible from the ground, but they determine whether your roof performs as expected for its full rated lifespan or develops problems prematurely.
Additional Steps for Complex Roofs
Some roofs require more than straightforward shingle replacement, which can lengthen the schedule slightly but still fits into a defined project window. Understanding these potential complications helps you set realistic expectations if your home has challenging architectural features.
Steep Pitches, Multiple Layers, and Structural Issues
OSHA-related roofing safety publications note that steeper roofs require additional fall protection and careful ladder and scaffold setup. This adds time for safe staging and movement but protects workers from serious injuries that could halt your project indefinitely.
Where long-term leaks have damaged underlying sheathing or framing, these components must be repaired before new roofing gets installed. What might have been a one-day job becomes a multi-day project, but addressing structural problems now prevents repeated disruptions to your yard when the same issues resurface later.
Homes with multiple existing shingle layers face special considerations. Building codes typically allow only two layers of asphalt shingles, so homes with that maximum must be stripped to bare decking. This increases tear-off time and debris volume but creates the best possible base for your new roof system.
Energy, Ventilation, and Resiliency Upgrades
HUD and high-performance rehab guidelines encourage addressing insulation and attic ventilation when roofs are replaced. Smart homeowners combine these improvements with roof replacement to avoid opening up their homes again soon for separate projects.
Adding ridge vents, soffit vents, or improving air sealing can happen during the same work window as roof replacement. Enhanced ventilation reduces ice dam formation and extends shingle life by keeping attic temperatures closer to outdoor temperatures during winter months.
In some regions, fortified roof standards and resilience programs promote enhanced fastening and impact-resistant products to reduce damage from severe weather. These upgrades add detail work but don’t necessarily require extra days on site if planned properly from the start.
Energy-efficient improvements done during roof replacement often qualify for utility rebates or tax credits that offset the additional cost. Your contractor can help coordinate these upgrades, so they integrate seamlessly with the main roofing project rather than creating separate construction phases.
Weather, Safety, and Seasonal Factors in CT/NY
Weather and safety regulations play central roles in determining when and how crews work on roofs in Connecticut and New York, especially during winter months and storm seasons. These rules protect both workers and your home but can affect project timing in ways that frustrate homeowners who want work completed quickly.
How Weather Can Delay or Compress the Job
Roofing safety guidance recommends postponing work in high winds above roughly 30 to 40 mph, during rain, sleet, or lightning, or when tropical storm watches or warnings are in effect. While these restrictions can push your start date back, they prevent dangerous situations where materials blow off roofs or water intrudes into your home’s interior.
Winter weather resources emphasize clearing snow and ice from roofs and ladders before work begins, using appropriate fall protection and footwear when working in cold conditions. These requirements can slow daily progress or shift start days, but they keep your project moving safely rather than dealing with worker injuries or weather damage.
Connecticut and New York experience dramatic weather swings, especially during spring and fall when ideal roofing temperatures coincide with unpredictable storm systems. Professional contractors monitor weather forecasts closely and plan tear-off phases for stable weather windows rather than risking exposure during approaching storms.
What This Means for “Yard Torn Up” Time
Because opening a roof during unsafe weather increases risks of water intrusion and material blow-off, contractors typically size tear-off sections to what they can secure the same day. This practice limits how long the roof and yard remain in a vulnerable state, even if it means working in smaller sections over multiple days.
If weather does force a pause mid-project, guidelines expect the site to be made safe and reasonably neat with materials secured and access paths maintained until work resumes. You shouldn’t experience tarps flying loose or debris scattering across your neighborhood during weather delays.
Temperature extremes also affect installation quality. Asphalt shingles seal poorly in cold weather below about 40 degrees Fahrenheit, while extreme heat above 90 degrees can damage shingles during handling. These temperature windows explain why many Northeast homeowners schedule roof replacements during spring and fall shoulder seasons when conditions are most favorable.
Understanding these weather and safety considerations helps you set realistic expectations. A project delayed by legitimate weather concerns protects your investment far better than one rushed through marginal conditions that compromise installation quality or worker safety.
Permits, Contractors, and Regulations in CT and NY
Licensing, permits, and inspection rules influence who can legally work on roofs and how projects get documented. While these requirements mainly affect the start date rather than how many days your yard sees active construction, they provide important protections worth understanding.
Licensing and Permits
Connecticut law treats roof work as a home improvement activity and requires home improvement contractors to be registered with the state. This registration process requires contractors to carry liability insurance and submit applications through the state’s online portal, giving homeowners a way to verify companies are properly credentialed.
Connecticut’s home improvement registration process helps protect consumers from unqualified or uninsured contractors who might disappear after taking deposits or leave your property in worse condition than they found it. Checking contractor registration takes just minutes but can save thousands in potential losses.
Building permit laws require permitted roof work to be inspected and conform to the State Building Code. This provides an extra layer of oversight on the quality and safety of completed roofs, ensuring installations meet minimum standards for your protection.
Why Regulatory Steps Help Homeowners
Permit and inspection requirements might seem like bureaucratic hassles that slow projects down, but they serve important purposes. Inspectors catch installation errors that could lead to leaks or structural problems years down the road when tracking down the original contractor becomes difficult or impossible.
Government homeowner resources encourage getting written contracts and detailed scopes for major work. These documents typically include cleanup and debris removal language so expectations are clear before your yard gets disturbed. Having these terms in writing protects you if contractors try to skip final cleanup phases or leave your property in unacceptable condition.
Working with properly licensed and insured contractors also protects you from liability if workers get injured on your property. Homeowner’s insurance may not cover injuries to uninsured contractors, leaving you exposed to potentially devastating lawsuits from workplace accidents.
What Homeowners Should Prepare For and Do
Your preparation and participation can meaningfully reduce the time your property feels torn up and improve how clean it looks when crews finish. Taking proactive steps before work begins and staying engaged during the project pays dividends in reduced stress and better outcomes.
Daily Expectations During Roof Installation
Homeowner guides explain that exterior projects bring temporary noise, dust, and access limits but stress maintaining safe entry routes and clear communication about daily progress. For roofing specifically, expect one or more days where cars need to be moved from the driveway, walkways are partially blocked, and outdoor areas feel busy with activity.
The noise during tear-off and installation can be intense, especially if you work from home or have young children napping. Nail guns create sharp, repetitive sounds that carry through walls and windows. Some homeowners choose to work elsewhere during peak noise days or plan activities away from home to minimize disruption.
Dust and small debris can enter your home through attic vents and recessed lighting during tear-off, even with careful containment efforts. Covering items stored in attics and expecting some interior cleanup helps prevent frustration when you discover fine dust on belongings.
Tips to Minimize Disruptions
Public guidance recommends moving vehicles, grills, furniture, and fragile yard décor away from the work zone before crews arrive. This speeds up staging and tarping while protecting your belongings from accidental damage during the chaotic tear-off phase.
If you have pets, plan for their safety and comfort during the project. The constant noise, unfamiliar people, and activity around your home can stress animals significantly. Some homeowners arrange pet boarding or daycare for the loudest work days to reduce anxiety for sensitive pets.
After installation, walking the property with your contractor and requesting additional nail sweeps or debris checks in high-traffic lawn and driveway areas helps restore safety and comfort quickly. Don’t hesitate to point out areas where cleanup seems incomplete or where you’re concerned about hidden nails.
Taking before and after photos documents your property’s condition and can prove valuable if disputes arise about damage or incomplete work. Photos also help you appreciate the dramatic improvement a new roof makes to your home’s appearance once the disruption ends.
Process Comparison: Simple vs. Complex Roof Replacement in CT/NY
| Phase | Simple Roof (Average Home) | Complex Roof (Steep/Multi-Layer/Damage) |
|---|---|---|
| Prep & Protection | Half-day staging, tarps, access planning | 1 day with additional safety setup and staging |
| Tear-off & Sheathing | Same-day tear-off and minor sheathing repairs | 1-2 days for multiple layers and structural repairs |
| Installation & Details | 1 day shingles and flashing work | 1-2 days for complex details and added upgrades |
| Cleanup & Walkthrough | Same-day or next-morning cleanup and nail sweep | Extended cleanup around larger staging areas |
| Typical On-Site Duration | 1-3 workdays total | 3-4+ workdays total |
This comparison illustrates how different roof characteristics affect timeline expectations. Most single-family homes fall into the “simple” category, but older homes or those with previous leak damage often require the extended timeline of complex projects.
Frequently Asked Questions About Roof Installation Timeline
Q: How long will my driveway be blocked during roof installation?
A: Your driveway typically needs to accommodate a dumpster and material staging for the duration of the project, which usually means one to three days for most single-family homes. Contractors plan dumpster placement to minimize access disruption while still allowing safe material disposal. Many homeowners can still park one vehicle in the driveway or use street parking during the work period. The dumpster gets removed within a day or two after project completion, fully restoring your driveway access.
Q: What happens if it rains during my roof installation?
A: Professional contractors monitor weather forecasts closely and avoid opening more roof than they can secure the same day. If unexpected rain arrives mid-project, crews deploy tarps and temporary coverings to protect exposed areas. Modern synthetic underlayments also provide excellent short-term water resistance if properly installed. However, safety guidelines require stopping work during active rain to prevent slips and falls, which can delay completion by a day or more until conditions improve.
Q: Can I stay home during roof installation?
A: Yes, most homeowners remain in their homes during roof installation. However, expect significant noise from tear-off and nail guns that can make phone calls, video meetings, or concentration difficult. Some homeowners choose to work elsewhere during peak noise days or arrange activities away from home. Homeowner guides recommend maintaining clear communication with contractors about which rooms to avoid accessing during work hours and where safe entry routes remain available.
Q: How do I know if my roof needs complete replacement versus repair?
A: HUD and FHA guidance require roofs to prevent moisture entry and provide reasonable future utility. If your roof is near the end of its expected lifespan (typically 20-25 years for asphalt shingles), shows widespread damage, or has multiple layers already, replacement usually makes more financial sense than repeated repairs. Professional contractors can assess your roof’s condition and help you understand whether patching will solve problems or just delay the inevitable full replacement that disrupts your yard again soon.
Q: What should I do to prepare my property before roofing crews arrive?
A: Move vehicles, outdoor furniture, grills, and fragile landscaping items away from the immediate work zone before crews arrive. Trim tree branches that hang over the roof or could interfere with ladder placement. Cover items stored in your attic with drop cloths or plastic sheeting to protect against dust. Remove wall decorations that could fall from vibrations during tear-off. Clear a path for contractors to access all sides of your home safely. Taking these steps helps crews work more efficiently and protects your belongings from accidental damage.
Q: How clean will my yard be after roof installation?
A: Professional contractors include debris removal and magnetic nail sweeps in their standard scope of work. Expect thorough cleanup of visible debris from your lawn, driveway, and landscaping areas. However, small nails or shingle granules may remain in grass or mulch beds despite best efforts. Walking your property with the contractor during the final walkthrough gives you the opportunity to request additional attention to specific areas where debris remains visible or concerning.
Your Roof Installation Timeline Starts With the Right Partner
Understanding what to expect during roof installation helps you prepare properly, set realistic expectations, and recognize quality work when you see it. While the process temporarily disrupts your daily routine and makes your property look like a construction zone, professional contractors compress that disruption into just a few focused days rather than stretching it across weeks of uncertainty.
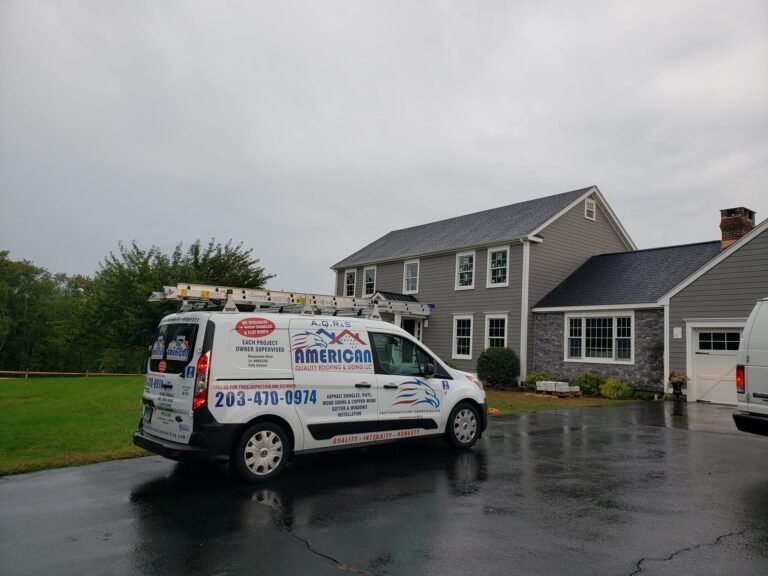
Connecticut and New York homeowners need roofing partners who understand local weather challenges, follow proper safety protocols, and deliver quality installations that protect homes for decades. At American Quality Roofing & Siding, we’ve spent over 25 years helping families throughout Connecticut navigate roof replacements with minimal stress and maximum results.
Our team brings factory certifications from GAF and CertainTeed, comprehensive licensing and insurance, and an A+ Better Business Bureau rating to every project. We understand that your biggest concern isn’t just getting a new roof but getting through the installation process with your daily life disrupted as little as possible.
When you work with American Quality Roofing & Siding, you get transparent timelines, detailed project planning, thorough property protection, and cleanup that restores your yard to safe, normal use as quickly as possible. We treat your home with the same care we’d want for our own families because that’s what local, family-owned businesses do.
Ready to replace your roof without the stress and uncertainty that often comes with major exterior projects? Call us at (203) 470-0974 for a free consultation. We’ll assess your roof’s condition, explain exactly what the installation process will look like for your specific home, and give you a detailed timeline so you know when to expect your property back to normal. With American Quality Roofing & Siding, you get the quality roof you need with the professional service you deserve.