Roof Installation Checklist for Homeowners
Have you ever watched a roofing crew arrive at a neighbor’s house and wondered exactly how much chaos your own yard might endure when it’s your turn? Connecticut and New York homeowners often lose sleep over the unknowns: will equipment tear up the lawn, how long will debris pile up, and what happens if inspectors find issues with frost protection or wetland setbacks? The good news is that licensed roofing contractors follow a structured sequence from permits to final inspections, typically completing residential projects in one to three weeks while using tarps and staging zones to protect your property. Northeast homes face unique challenges with deep frost lines of 36 to 48 inches, heavy snow loads, and strict zoning rules that affect everything from access routes to drainage patterns. Yet when you understand each phase of the roofing process and what protective measures contractors should take, you can anticipate disruptions, ask the right questions, and ensure your investment delivers decades of reliable protection. Whether you’re replacing an aging asphalt roof or upgrading to metal, knowing what to expect at every step helps you feel confident instead of anxious as work unfolds in your own backyard.
Key Takeaways
- Roof Projects in CT and NY typically span one to three weeks for complete installations. A straightforward 2,000 square foot asphalt shingle replacement on flat terrain may finish in five to 10 days, while projects involving steep slopes, wetland staging restrictions, or extended inspection timelines can stretch to three weeks or more.
- Preparation and permits come first in the roofing checklist. Zoning reviews and utility coordination can take one to four weeks before physical work begins. Ice and water barriers become critical in the Northeast, where frost lines reach 36 to 48 inches deep, protecting against foundation heaving and ice dam formation.
- Underlayment and flashing form the backbone of leak prevention. Contractors must extend ice shield protection at least 24 inches inside exterior walls at eaves and cover valleys with full-width barriers before any shingles go down, following Connecticut building department standards.
- Shingle installation and ventilation close out the weatherproof envelope. Each shingle requires four to six galvanized nails depending on slope, while ridge and soffit vents create the airflow needed to prevent snow melt condensation and meet Class A fire ratings required in both states.
- Inspections are mandatory checkpoints in the roof replacement guide. Rough-in inspections verify underlayment and flashing before shingles, and final inspections confirm code compliance before issuing occupancy certificates, preventing costly callbacks.
- Yard cleanup is a standard expectation written into professional contracts. Reputable crews protect lawns with tarps and plywood walkways, haul debris daily, and restore compacted areas within days of project completion, minimizing the tear-up period homeowners dread.
Understanding the Roof Installation Process in CT and NY
Northeast roofing professionals follow predictable installation sequences, but they must adapt these steps to handle the region’s demanding conditions. Heavy snow loads ranging from 20 to 55 pounds per square foot in different zones, persistent ice dam risks, and strict code requirements for underlayment and flashing all shape how contractors approach residential projects. Local zoning regulations add another layer, with spite laws preventing obstructive roof heights that block neighbors’ views and wetland buffer requirements that restrict where crews can stage materials on sloped or environmentally sensitive properties.
Connecticut and New York building codes mandate specific protections that go beyond basic weatherproofing. Contractors must install ice and water shield barriers that extend well beyond what warmer climates require, ensuring protection against the freeze-thaw cycles that plague Northeast homes every winter. The roofing process steps must account for these regional demands from the very first planning meeting through final inspection.
Local Roof Environment and Process Needs
Regional climate patterns create unique challenges that affect every phase of roof installation. The Northeast experiences dramatic freeze-thaw cycles throughout late fall, winter, and early spring, requiring contractors to install drainage systems and flashing details that account for frost depths of 36 to 48 inches below grade. Water that penetrates even small gaps in the roof envelope can freeze, expand, and cause structural damage over successive winters.
Wooded properties and sloped yards common across Connecticut and New York present additional logistical hurdles. Crews need adequate staging zones for materials and equipment that comply with setback requirements from property lines, wetlands, and steep slopes. Many municipalities enforce strict rules about where contractors can place dumpsters, store shingle bundles, and park vehicles during active work. Homeowners with constrained yards may need to coordinate with neighbors for temporary access easements, adding time to the pre-installation preparation phase of the roofing checklist.
National vs. CT/NY Installation Timelines
Standard roof replacement timelines often stretch longer in the Northeast compared to milder regions, primarily due to the additional inspection requirements, deeper frost protection measures, and permit review periods that Connecticut and New York municipalities require. While national averages provide useful benchmarks, homeowners should plan for regional variations that reflect local code complexity and weather-related precautions.
Industry standards across the country suggest residential roof installations typically progress quickly once permits are in hand. However, the permitting phase itself introduces significant timeline variability between states and even between neighboring towns.
Typical Timeline Ranges by Roof Size
A standard 2,000 square foot residential roof with straightforward access and average slope might complete in three to seven days nationally, covering everything from tear-off through final cleanup. In Connecticut and New York, that same project more realistically requires five to 14 days for the physical installation work, with an additional one to four weeks for permit approvals before crews can even begin. Low-slope roofs add complexity because they require additional underlayment layers and more intensive flashing details to prevent water infiltration.
Larger homes in the 3,000 to 5,000 square foot range or properties with multiple roof planes, dormers, and complex flashing conditions can easily extend installation timelines to two or three weeks. Projects involving metal roofing systems or specialty materials like slate require even more careful sequencing and may need extended curing times for sealants in cold weather conditions.
Day-by-Day Breakdown Models
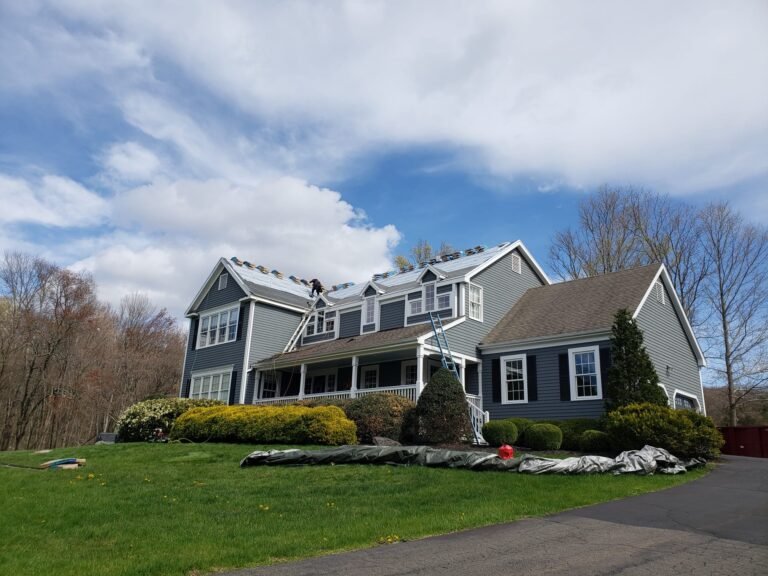
A typical roof installation checklist in Connecticut or New York unfolds something like this for a moderately sized home. Days one and two focus on permit posting and final utility coordination, with crews staging materials and protecting landscaping with tarps and barriers. Days three and four involve tear-off of existing roofing, deck inspection and repairs, underlayment installation, and the critical rough-in inspection that verifies ice barrier coverage and flashing preparation.
Days five through eight cover the bulk of shingle installation, valley and penetration flashing, and vent integration. Days nine and 10 typically handle final inspections, detail work around chimneys and sidewalls, gutter installation or reconnection, and comprehensive site cleanup. This timeline can compress for experienced crews working on simple roofs in good weather, or it can expand significantly when slopes require extra safety equipment, when inspection scheduling creates gaps between work phases, or when weather interruptions halt progress.
Key Steps in the Roof Installation Process
Professional roofing contractors follow a methodical checklist of phases that ensure wind and snow resistance according to Connecticut State Building Code and New York State requirements. These steps build upon one another, starting with structural assessments and ending with ventilation systems that protect the roof assembly from interior moisture and temperature extremes. Skipping or rushing any single phase can compromise the entire system’s performance over its expected lifespan.
Each major phase includes specific quality checkpoints that experienced contractors verify before moving forward. This systematic approach prevents common installation errors that lead to premature failures, callbacks, and warranty disputes down the line.
Site Preparation and Layout
Before any roofing materials arrive, contractors must verify utility line locations if work will occur near service masts or overhead connections. Most professionals call 811 for utility locates as a precaution, even when roof edges seem well clear of underground services. Protecting the yard becomes the next priority, with tarps extending at least three feet beyond the roof’s drip line to catch falling debris and cushion the impact of discarded materials.
Zoning compliance reviews examine site-specific constraints, particularly on properties near wetlands, steep slopes, or within homeowner association jurisdictions that restrict construction hours or staging areas. The building permit process in watershed protection zones can require additional environmental documentation. Deck inspection follows next, with contractors examining roof sheathing for rot, weak spots from previous leak damage, or inadequate fastening that must be corrected before new underlayment goes down.
Underlayment and Flashing Installation
Ice and water shield barriers represent the first critical weatherproofing layer in the new roof installation. Connecticut and New York codes require these self-adhering membranes to extend from roof eaves a minimum of 24 to 36 inches inside the exterior wall line, creating a watertight seal that prevents ice dam water from migrating under shingles during winter freezes. Valleys receive full-width ice shield coverage, while areas around chimneys, skylights, and plumbing vents get special attention with overlapping barrier strips.
Drip edge flashing gets installed next at eaves and rakes, with fasteners placed 12 inches on center to prevent wind uplift. Step flashing at sidewalls and valley flashing with minimum four-inch exposure integrate with the ice barrier system to channel water safely off the roof. The rough-in inspection occurs at this stage, with building officials verifying that all underlayment, flashing, and drip edges meet code requirements before contractors can proceed with shingle installation.
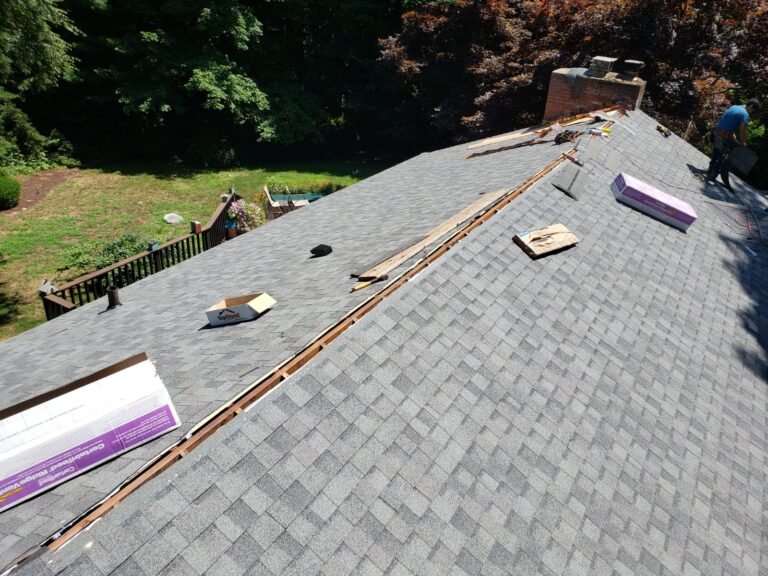
Shingle, Vent, and Accessory Attachment
Shingle installation begins only on properly prepared and inspected deck surfaces, using four to six galvanized nails per shingle depending on slope and wind exposure ratings. Low-slope roofs below 4:12 pitch require doubled underlayment and often need six nails per shingle for adequate wind resistance, while steeper slopes may use fewer fasteners if they meet manufacturer specifications. Class A fire-rated shingles are standard for residential applications in both states, providing the highest level of protection against external fire exposure.
Ridge vents and soffit vents create the balanced airflow system that prevents moisture accumulation in attic spaces and helps snow melt uniformly rather than creating damaging ice dams at eaves. Contractors install these ventilation components according to manufacturer specifications for net free area, ensuring adequate intake at soffits and exhaust at the ridge. Gutter systems typically get installed or reconnected during the final days of the project, with careful attention to slope and downspout placement that directs water away from foundations and meets any site-specific drainage requirements.
Additional Steps for Complex Installs
Northeast residential roofing often involves conditions that demand extra safeguards and specialized techniques beyond basic installation procedures. Properties with steep slopes, proximity to protected wetlands, or locations in high snow load zones require contractors to adapt their approach, often adding one to three days to the overall timeline while ensuring long-term durability and code compliance.
Handling Slopes, Wetlands, and Snow Loads
Steep roof pitches above 6:12 require racking installation methods where underlayment gets double-lapped and shingles are applied in vertical columns rather than horizontal courses to improve worker safety and prevent material slippage. Silt fencing and erosion controls become mandatory when work occurs within 75 to 150 feet of wetland buffers, protecting sensitive areas from sediment runoff during tear-off and cleanup phases.
Snow load calculations directly influence truss spacing, sheathing thickness, and fastener schedules in the Northeast. Roofs must be engineered to support 20 to 55 pounds per square foot depending on the specific location and elevation, with higher values applying to inland and elevated properties. Contractors verify these specifications during the permitting phase and adjust installation details accordingly, potentially adding structural reinforcement or upgrading from standard OSB sheathing to thicker plywood panels.
Finishing Touches and Yard Restoration
Final trim work includes installing ridge caps, fascia trim boards, and any decorative elements specified in the project scope. Contractors then shift focus to yard restoration, reseeding any areas where equipment traffic caused compaction or rutting, and pressure washing driveways and walkways to remove dust and granule debris. Height verification becomes important in areas with spite law concerns, ensuring the completed roof complies with local ordinances that prevent malicious obstruction of neighboring properties’ sunlight or views.
Permits, Utilities, and Regulations in CT and NY
Legal preparation through official state and local portals prevents work stoppages, fines, and potential project abandonment due to code violations. Both Connecticut and New York maintain detailed building codes that apply to all residential roof replacements, with municipalities enforcing additional requirements through local zoning ordinances and wetland regulations.
Homeowners or their contractors must secure proper permits before any work begins. Skipping this step, even for projects that seem minor, can result in stop-work orders, permit fees doubling as penalties, and potential complications when selling the home if unpermitted work appears during disclosure reviews.
Zoning and Utility Coordination
Building permits in Connecticut typically require submission of roof plans showing shingle type, number of layers being removed and installed, contractor license numbers, and estimated project value. Fees range from $100 to $500 depending on project scope and municipality, with approval timelines varying from one to 10 business days for straightforward replacements. New York’s Department of Buildings process can take considerably longer, particularly in New York City boroughs where plan review queues and special inspection requirements add weeks to the approval timeline.
Zoning reviews examine whether the proposed work affects setbacks, building heights, or drainage patterns, particularly on properties with steep slopes or proximity to wetlands. Some municipalities prohibit roof modifications that would create spite conditions by blocking neighbors’ previously established views or creating new drainage patterns that direct runoff onto adjacent properties. Utility coordination through the 811 call-before-you-dig system becomes necessary when work involves moving service masts, upgrading electrical service capacity, or working near overhead power lines.
What Homeowners Should Prepare For and Do
Understanding what happens during each project phase helps homeowners align their schedules, protect their property, and work effectively with roofing crews. Active participation in key decisions and inspections ensures the final result matches expectations and meets all contractual obligations.
Daily Expectations During Install
Expect noise and activity to be most intense during days three through seven when tear-off and shingle installation occur. Debris containment systems like rooftop chutes and ground-level tarps minimize yard impact, but some dust and granule scatter is inevitable. Homeowners should plan to be available for the initial site layout review to approve staging areas and access routes, and should attend both rough-in and final inspections to ask questions and verify quality alongside building officials.
Tips to Minimize Disruptions
Move vehicles from driveways and garages before crews arrive to prevent damage from falling debris. Secure outdoor furniture, grills, and decorative items that could be damaged by wind-blown materials or need to be relocated for access. Pet owners should make arrangements to keep animals indoors during active work hours, as the noise can be stressful and open yards create escape risks. Disconnect and secure gutter extensions before work begins to prevent damage during removal and reinstallation.
Phase scheduling helps reduce yard impact by concentrating work in specific zones rather than scattering materials and equipment across the entire property. Homeowners on properties near wetlands or with sensitive landscaping should work with contractors to identify staging zones that minimize soil compaction and protect root systems of mature trees and shrubs.
Process Comparison Table: Simple vs. Complex Roof Install in CT/NY
| Phase | Simple Install (Flat 2,000 sq ft) | Complex Install (Slope/Wetlands) |
|---|---|---|
| Permits & Prep | 1-2 weeks standard processing | 2-4 weeks with zoning review for environmental compliance |
| Tear-Off/Underlayment | 1-2 days removal and deck prep | 2-3 days with frost barrier extensions at eaves |
| Flashing/Shingles | 2-4 days standard installation | 4-6 days with snow load rated fastening |
| Inspections/Cleanup | 1-2 days for finals and site restoration | 2+ days with detailed final inspections |
| Total Timeline | 1 week active installation | 2-3 weeks start to finish |
Common Mistakes Homeowners Make During Roof Installation
DIY permit applications frequently fail to include all required documentation, leading to rejections and resubmission delays that can add weeks to project start dates. Skipping rough-in inspections to save time often voids manufacturer warranties and creates liability issues if hidden defects emerge years later. Many homeowners underestimate yard protection needs, failing to request tarps or plywood walkways, which results in compacted soil, damaged sprinkler heads, and dead grass that requires expensive restoration.
Ignoring frost line requirements during underlayment installation creates conditions for ice dams that damage gutters, fascia, and even interior ceilings when snowmelt refreezes at eaves. Homeowners who choose contractors based solely on the lowest bid rather than verifying licenses, insurance, and references often face quality issues, abandoned projects, or discovery that work doesn’t meet code when they try to sell their homes.
Preparing Your Property for Roof Installation in CT/NY
Trim tree branches that hang within 10 feet of the roof to provide crews with safe working clearance and prevent damage to limbs during material staging and debris removal. Clear gutters and downspouts before work begins so contractors can assess existing drainage function and identify any repairs needed during the project. Obtain a boundary survey if property lines are unclear, particularly on wooded lots where spite law concerns or zoning setbacks might affect where crews can work or stage materials.
Move indoor valuables away from exterior walls and cover items in attics with plastic sheeting to protect them from dust that can filter through ceiling penetrations during tear-off. Notify neighbors about the upcoming project timeline so they can plan around noise and truck traffic, maintaining good relationships and potentially heading off complaints that could result in work hour restrictions.
Frequently Asked Questions About Roof Installation Checklist
Q: What is the typical roof installation process for homes in Connecticut and New York?
A: The roofing process follows a structured sequence starting with permits and site preparation, moving through tear-off and deck inspection, then underlayment and flashing installation with rough-in inspection, followed by shingle and vent installation, and concluding with final inspection and cleanup. Total timelines range from one to three weeks depending on roof size, complexity, and weather conditions.
Q: How long will my yard be torn up during a roof replacement?
A: Active installation work with materials staged in your yard typically lasts five to 14 days for most residential projects. Professional contractors use tarps, plywood walkways, and debris chutes to minimize impact, with yard restoration including reseeding and cleanup completed within a few days after final inspection. Properties with wetland restrictions or steep slopes may experience longer staging periods.
Q: Are permits required for roof installation in my area?
A: Yes, both Connecticut and New York require building permits for residential roof replacements and major repairs. Permits ensure work meets state building codes, includes proper inspections, and provides documentation for future home sales. Skipping permits can result in fines, stop-work orders, and complications during property transactions.
Q: What should I expect on the first day of roof installation?
A: Day one typically involves final site setup, including positioning dumpsters or debris containers, laying protective tarps around the home’s perimeter, and potentially beginning tear-off of old roofing materials. Contractors usually don’t install new shingles on the first day, focusing instead on preparation and ensuring all materials and equipment are properly staged for efficient work flow.
Q: How can I prepare my yard for roof installation?
A: Move vehicles, outdoor furniture, grills, and decorative items away from the house perimeter. Trim overhanging branches, clear items from gutters, and mark any sprinkler heads or underground utilities near work areas. Secure pets indoors and notify neighbors about the project timeline. Work with your contractor to approve staging zones that minimize impact on landscaping, particularly around mature trees or sensitive plantings.
Final Thoughts
Connecticut and New York roofing checklists deliver secure installations by addressing the region’s demanding frost depths, heavy snow loads, and strict regulatory requirements through systematic phases that span one to three weeks from permits through final cleanup. Understanding each step from underlayment and flashing installation through mandatory inspections helps homeowners anticipate timelines, protect their property with tarps and staging controls, and ensure their investment meets the code standards that prevent premature failures. When you master the phases outlined in state building codes and work with licensed contractors who prioritize both quality and yard protection, you can replace the anxiety of “what happens next” with confidence in a weathertight roof designed for decades of Northeast winters.
The long-term value of a properly installed roof goes well beyond just keeping water out. You gain peace of mind knowing your home can withstand ice dams, wind-driven rain, and the relentless freeze-thaw cycles that challenge every Connecticut and New York residence. Your investment protects not just your family’s comfort and safety, but also your home’s resale value and your ability to secure favorable insurance rates in regions where weather-related claims are common.
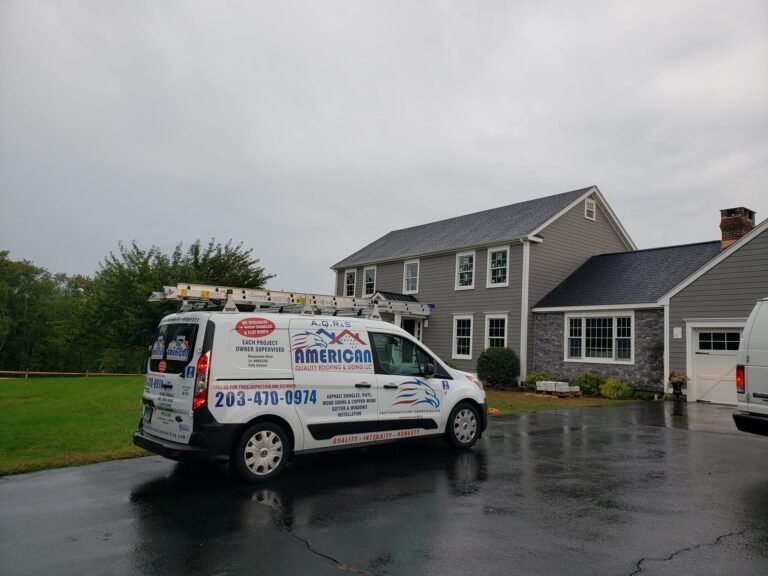
For over 25 years, American Quality Roofing & Siding has protected Connecticut families through complete roof replacements, emergency repairs, and new installations that meet the highest standards for materials and workmanship. As a licensed contractor (CT #HIC 0633301) with an A+ Better Business Bureau rating and factory certifications from GAF and CertainTeed, we bring the expertise and accountability that turn complex roofing projects into smooth, predictable experiences. Whether you’re facing an aging asphalt roof, storm damage, or want to upgrade to metal roofing for superior durability, our team handles every phase from permit coordination through final inspection with the personalized attention that only a family-owned business can provide. Contact us at (203) 470-0974 for your free consultation, and let us show you how professional roofing should be done in Connecticut.