New Roof Installation: What Homeowners Should Know
Ever watched a roofing crew pull up to your neighbor’s house with massive dumpsters and wondered how long your lawn would survive a similar project? Most Connecticut and New York homeowners wrestle with this concern when facing a new roof installation, worried about torn-up yards, weeks of noise, and whether local codes about frost lines or wetland buffers will drag out the process. The good news is that modern roofing teams follow a surprisingly efficient sequence, typically completing standard homes in just 1-3 days with contained staging that protects your property. While Northeast elements like steep pitches, weather delays, and local permit requirements add complexity, contractors have refined workflows that minimize disruption and restore your yard the same day. Whether you’re dealing with a straightforward asphalt shingle replacement or a more involved project on a sloped lot near water, understanding what actually happens during those focused days can ease your concerns and help you prepare properly. Your property matters, and knowing how professional crews work within CT and NY regulations means you can plan around the brief but intensive work period without sacrificing your peace of mind.
Key Takeaways
- Most Projects Wrap Up in 1-3 Days: Standard asphalt shingle replacements on average homes take 1-3 days total, with simple jobs finishing in 1-2 days while steep pitches, repairs, or weather delays push timelines to 3 or more days.
- Tear-Off Day Creates Brief Exposure: Removing old materials to the deck takes 4-8 hours, exposing your yard briefly before crews secure new protective layers and contain debris in driveway-staged dumpsters.
- Permits and Prep Catch Problems Early: Connecticut requires building permits for roof work, and the inspection process spots deck rot or missing ice barriers before installation begins, saving time later.
- Code Compliance Guides Installation: Underlayment, starter strips, and proper flashing must meet standards like minimum 2:12 slopes for shingles and 24-inch ice dam barriers to handle Northeast winters.
- Cleanup Happens Same Day: Professional teams conduct debris removal and magnetic nail sweeps to restore yard usability immediately after completing the installation.
Understanding the Roof Installation Process in CT and NY
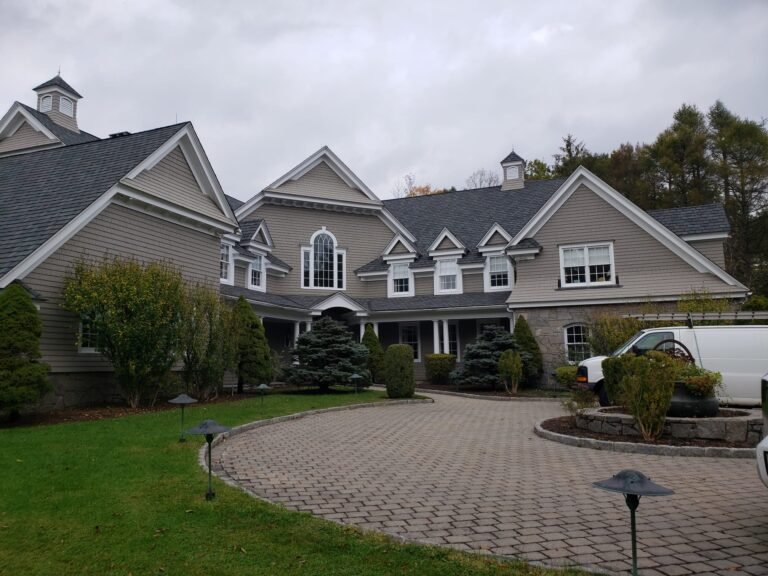
When roofing crews arrive at your Connecticut or New York home, they’re working within a regional context that shapes every decision. Northeast properties present unique challenges that affect timing, from mature trees creating shade and debris to steep roof pitches common in colonial architecture. Local building codes prioritize frost protection and proper drainage, reflecting decades of experience with harsh winters and heavy snowfall. Spite laws limit obstructive barriers that could hinder roof access, while wetland regulations enforce silt controls in buffer zones near water features.
The installation process follows a methodical sequence designed to protect your home while minimizing yard impact. Crews don’t simply tear off old shingles and slap on new ones. They conduct structural assessments, verify permit compliance, stage materials efficiently, and execute each phase with attention to regional weather patterns. A typical single-family home sees active work concentrated in a focused 1-3 day window, though preparation and permitting happen weeks earlier.
Local Roof Environment and Process Needs
Your property’s specific characteristics determine how contractors approach the job. Steep-pitched roofs, which are common in historic New England homes, require additional safety equipment and may slow installation by half a day compared to low-slope ranches. Wooded edges mean crews must navigate overhanging branches and plan debris removal routes that won’t damage landscaping. Zoning regulations for drainage become especially relevant on sloped lots where runoff could affect neighboring properties or protected wetlands.
Before tear-off begins, contractors verify that staging areas, typically your driveway or a flat section near the home, can accommodate roll-off dumpsters without compacting soil or blocking access. This planning phase prevents the chaotic yard disruption many homeowners fear. Experienced teams lay plywood pathways for wheelbarrows on slopes, protecting grass while moving materials. The goal is containing mess to predictable zones rather than spreading it across your entire property.
National vs. CT/NY Installation Timelines
Standard roofing timelines get stretched in the Northeast due to specific regional factors. While national averages suggest 1 day for a 1,500 square foot flat roof, Connecticut and New York projects typically span 1-3 days with built-in buffers for weather holds and code verifications. This difference reflects the reality of working in a climate where morning frost can delay starts and afternoon thunderstorms force crews to tarp and wait.
Curing needs for sealants and adhesives also factor into Northeast timelines. Cold temperatures slow the bonding process for underlayment and flashing materials, requiring contractors to schedule work during optimal conditions. Frost lines reaching 42 inches deep influence any structural tie-ins, though they don’t directly affect roof surface work. Inspectors in CT and NY pay closer attention to ice dam prevention and ventilation adequacy, adding a half-day to the final approval process compared to warmer regions.
Typical Timeline Ranges by Roof Size
A 1,500 square foot home with a simple gable roof and one layer of existing shingles represents the fastest scenario. Crews can complete tear-off, deck inspection, underlayment installation, and new shingle application in a single 10-hour day if weather cooperates. More commonly, this size home takes 1.5 to 2 days, with Day 1 focused on removal and deck prep, and Day 2 on installation and cleanup.
Larger homes in the 2,500-3,000 square foot range generally require 2-3 days. Complex roof geometries with multiple valleys, dormers, or second-story additions add time for proper flashing installation at each transition point. Homes with multiple existing shingle layers face longer tear-off periods since codes often require removal down to the deck rather than layering over old materials. Weather delays extending projects by 1-2 days remain common during spring and fall shoulder seasons when forecast accuracy matters most.
Day-by-Day Breakdown Models
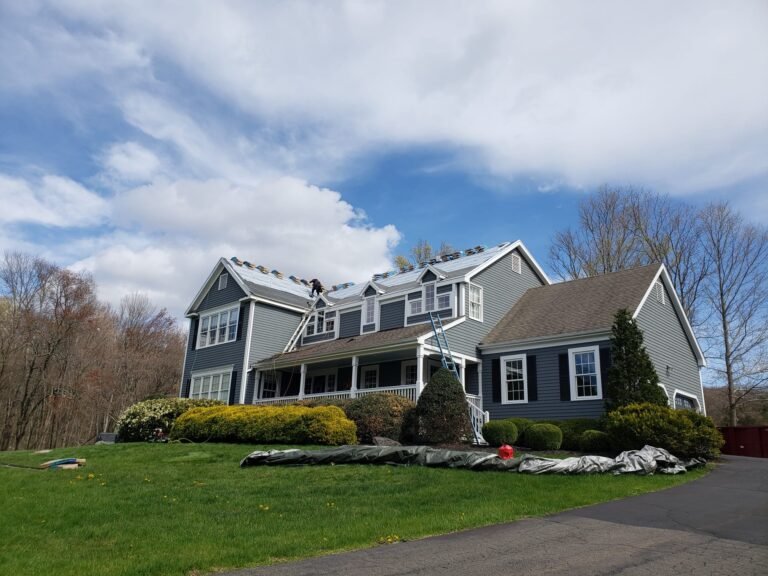
Understanding the daily flow helps set realistic expectations. Day 1 typically starts with permit verification and final site walkthrough, followed by dumpster delivery and protective measures for landscaping. Tear-off consumes most of the first day, with crews working section by section to minimize open deck exposure. They inspect each section for rot, damaged rafters, or code violations requiring repair. By end of Day 1, your home should have at least temporary weather protection, often synthetic underlayment stapled to exposed areas.
Day 2 begins with any necessary deck repairs using plywood or OSB boards matched to existing thickness. Crews then roll out full underlayment, install drip edge, and begin shingling from the bottom up. Valleys get special attention with woven or closed-cut techniques depending on roof pitch. Ridge vents go in last, ensuring proper attic ventilation. Day 3, when needed, handles finishing touches like step flashing around chimneys, final ridge cap installation, and comprehensive cleanup including magnetic sweeps for stray nails.
Key Steps in the Roof Installation Process
Each phase of roof installation serves specific structural and protective functions. While regional codes vary slightly, the fundamental sequence remains consistent whether you’re installing asphalt shingles, metal panels, or tile roofing. Understanding these steps helps you recognize progress and identify when something might be going off track.
Site Preparation and Layout
Professional crews start by conducting utility scans if chimney modifications or satellite dish relocations are needed. They secure staging areas on driveways or designated flat zones, laying tarps to catch debris and protect pavement from staining. Deck exposure checks happen during tear-off to identify rot that violates code requirements for structural integrity.
Contractors mark sections of the roof to ensure systematic removal and installation. They position dumpsters for easy debris tossing without excessive lifting or walking, which speeds work and reduces safety risks. Ground crews organize shingle bundles, underlayment rolls, and flashing materials for efficient hand-off to roof teams. This choreography minimizes wasted motion and keeps the project moving at optimal pace.
Tear-Off and Decking Repair
Dumpster bins collect old shingle layers and felt paper as crews work methodically across the roof surface. Pry bars and specialized scrapers remove stubborn nails and adhesive residue. Once the deck is bare, inspectors look for soft spots indicating water damage or inadequate support. Any compromised sections get replaced with new plywood or OSB cut to precise dimensions.
Modern practices favor synthetic underlayment over traditional felt paper because it resists tearing and provides superior water protection during installation. Crews roll this material horizontally across the roof, starting at the eaves and overlapping each course by the manufacturer’s specified margin. This base layer acts as a critical backup barrier if shingles ever fail or if wind-driven rain penetrates the primary roof surface.
Shingle, Flashing, and Vent Attachment
Ice barriers extending 24 inches inside exterior walls go down first in areas prone to ice dam formation, typically along eaves and in valleys. Valley flashing, whether metal or woven shingle, gets installed next to channel water effectively. Starter strips run along eaves to provide proper overhang and seal against wind uplift.
Shingles get nailed in courses working from bottom to top, with each row overlapping the one below. Minimum 2:12 slopes are required for standard shingles, though many Northeast homes exceed this by significant margins. Crews maintain consistent reveal, the exposed portion of each shingle, to ensure proper water shedding and aesthetic uniformity. Ridge vents get plumbed last, providing crucial attic ventilation that prevents moisture buildup and extends roof life.
Additional Steps for Complex Installs
Not every roof follows the standard playbook. Homes with architectural complexity, environmental constraints, or specific code triggers require extra attention that extends timelines and changes crew approaches. Understanding these scenarios helps you anticipate whether your project will take the minimum or maximum time within the typical range.
Handling Steep Slopes, Wetlands, and Storms
Steep pitches exceeding 8:12 require specialized safety harnesses and toe boards that slow installation pace. Crews may need scaffolding for safe access to difficult areas like second-story dormers or turrets. Stepped flashing around chimneys on steep roofs demands precise cutting and multiple sealant applications, adding several hours compared to simpler penetrations.
Properties near wetlands face additional regulatory oversight. Silt fencing and erosion controls may be required even for roof work if runoff could carry debris into protected buffer zones. NOAA weather data showing frost risks or rain probability leads contractors to deploy tarps overnight, adding setup and removal time that can extend projects by a full day when storms pause work mid-installation.
Finishing Touches and Yard Restoration
Once shingles are secured, crews install drip edges along rakes and eaves, then apply ridge caps over the peak for weatherproof transitions. They seal around penetrations like plumbing vents and skylights with flexible boot flashings. Final inspections verify proper nailing patterns and adequate ventilation before crews turn attention to cleanup.
Yard restoration involves more than just removing the dumpster. Teams conduct thorough debris sweeps, using magnets to collect stray nails that could puncture tires or injure pets. They reseed paths worn by foot traffic, a gesture that builds trust and demonstrates attention to your property’s condition beyond just the roof. Driveways get swept, tarps folded, and any protective coverings over shrubs or AC units removed, returning your home’s exterior to pre-project appearance within hours of completing the final ridge cap.
Permits, Utilities, and Regulations in CT and NY
Navigating the regulatory environment is crucial for avoiding project delays and potential fines. Both Connecticut and New York have established frameworks governing roof work, though specific requirements vary by municipality. Getting compliance right from the start prevents mid-project stops and ensures your new roof meets current codes for safety and longevity.
Zoning and Utility Coordination
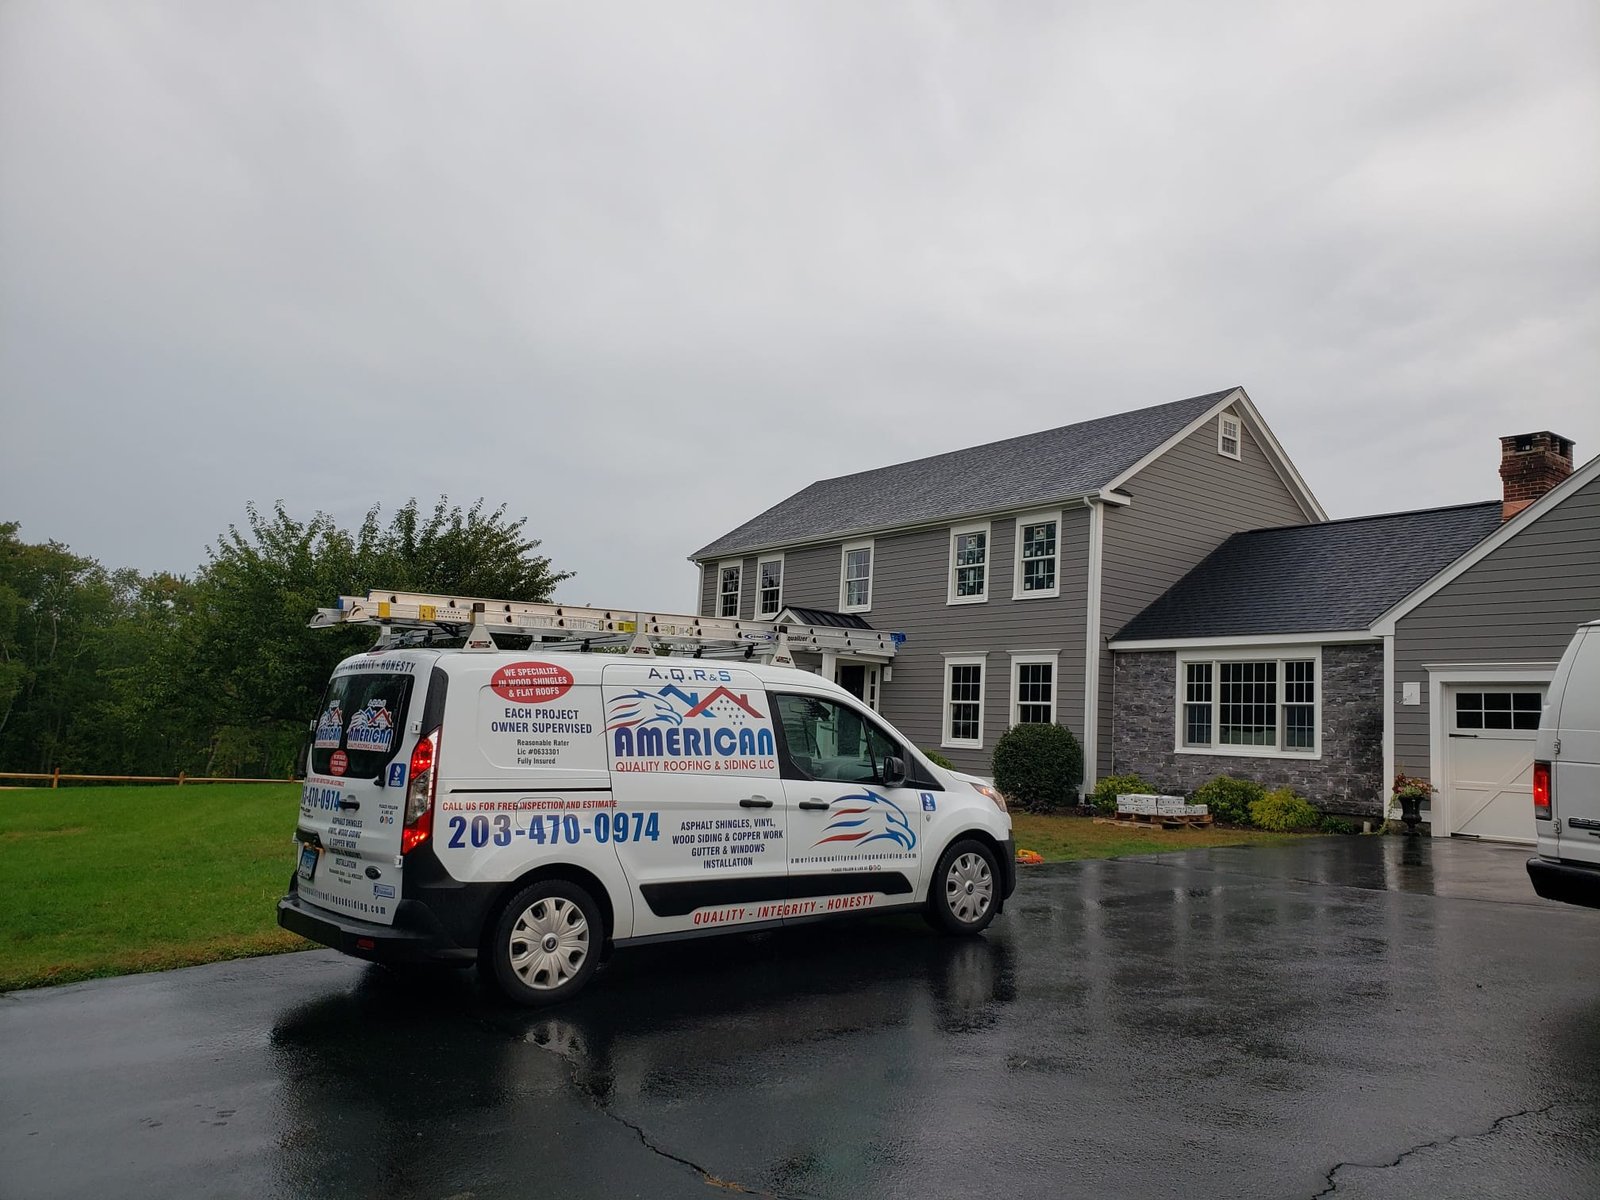
Building permits in Connecticut are required for roof work and typically cost $100-300 depending on project scope and local fee structures. Applications move through electronic portals where contractors submit details about materials, methods, and timeline. Processing usually takes a few days to two weeks, so savvy contractors file permits well before scheduling crews to avoid gaps between approval and work start.
Utility coordination becomes relevant if you’re adding solar panels or modifying service entries during the roof replacement. Calling 811 before any work that might affect underground or overhead utilities is mandatory and free. Wetland reviews through DEEP or local commissions apply to sloped properties near watercourses, adding several weeks to pre-construction timelines. Spite laws in New York limiting excessive barriers to 10 feet can affect temporary fencing or equipment placement if neighbors raise concerns about access blocking.
What Homeowners Should Prepare For and Do
Your active participation makes the installation process smoother for everyone involved. While contractors handle the technical work, several homeowner responsibilities directly impact project efficiency and final outcomes. Understanding what to expect each day helps you anticipate needs and avoid surprises.
Daily Expectations During Install
Day 1 brings the most noise and visible activity. Expect the sound of pry bars scraping, shingles hitting dumpsters, and crew coordination shouts throughout the workday, typically 7 AM to 5 PM. Ladder access points mean you’ll see workers near windows, though professional crews maintain awareness of privacy and avoid looking into living spaces. Your driveway will be blocked by the dumpster and material pallets, so plan alternate parking for the project duration.
Days 2-3 shift to installation sounds: nail guns firing in rapid succession, crews walking overhead, and periodic discussions about flashing details or code compliance questions. You’ll have limited exterior access since ladders and safety perimeters occupy pathways. Before the final sweep, do your own walkthrough to check for concerns about shingle alignment, vent placement, or any areas that look incomplete. Most contractors appreciate this collaborative verification and will address questions before packing up.
Tips to Minimize Disruptions
Clear your driveway completely before crews arrive, moving vehicles, bikes, and yard equipment to alternative storage. Relocate pets indoors or to a quiet area away from the work zone since the noise can be stressful for animals, and there’s a risk of them escaping through opened gates or slipping past distracted workers.
Schedule roof work for spring or fall when frost delays are less likely and temperatures support proper material curing. Avoid peak summer heat which can make shingles too pliable and winter cold which prevents adhesive bonding. Inform neighbors a day or two in advance, especially if your homes share property lines or if noise might affect remote workers or young children on nap schedules. This courtesy prevents complaints and maintains community relationships.
Process Comparison: Simple vs. Complex Roof Install in CT/NY
Understanding the difference between straightforward and complicated projects helps set realistic expectations for your specific situation. The following comparison highlights how various factors extend timelines and what drives those changes.
| Phase | Simple Install (1,500 sq ft Flat) | Complex Install (Steep/Wetlands) |
|---|---|---|
| Prep & Tear-Off | 4-8 hours | 1 day with buffer zone setup |
| Decking & Underlayment | Half day with minimal repairs | 1 day with rot repairs and code upgrades |
| Shingles/Flashing | 1 day for standard installation | 1-2 days for steep pitch work |
| Total Timeline | 1-2 days with good weather | 2-3+ days with inspection holds |
Simple installations benefit from straightforward geometries and clean deck conditions. Complex projects face compounding factors where steep slopes require more safety setup, poor deck conditions demand extensive repairs, and wetland proximity triggers additional inspections. Each complication doesn’t just add time linearly but can create cascading effects where one delay triggers another.
Common Mistakes Homeowners Make During Roof Installation
Even with professional contractors handling the work, homeowner decisions significantly impact project success. Avoiding these frequent errors saves time, money, and frustration during what should be a straightforward process.
Skipping or delaying permit applications ranks as the most costly mistake. Some homeowners attempt to save fees or time by proceeding without approval, only to face stop-work orders mid-project when inspectors make routine checks. The resulting delays while obtaining retroactive permits and potential fines far exceed the original permit cost. Always verify your contractor has pulled proper permits before work begins.
Ignoring weather forecasts leads to unnecessary complications. Starting a project when rain is predicted within 48 hours risks leaving your home exposed if crews can’t complete protective phases before storms hit. While contractors monitor weather closely, homeowners should also check extended forecasts and discuss contingency plans for unexpected changes. This shared awareness prevents panic when rain forces temporary work halts.
Neglecting the final cleanup verification creates safety hazards that persist long after crews leave. Walk your entire property, not just visible areas, to check for debris that magnetic sweeps might have missed. Roof nails in grass pose serious risks to children, pets, and lawnmower blades. Take time for a thorough inspection rather than assuming the job is completely finished once shingles are in place.
Skipping the official inspection appointment is another critical error. Even if your roof looks perfect, code compliance verification protects you if problems develop later. Inspectors check ventilation adequacy, flashing installation, and other details that aren’t visible from the ground. Their sign-off provides documentation that work met standards, valuable leverage if warranty claims arise down the road.
Preparing Your Property for Roof Installation in CT/NY
Proper preparation smooths the installation process and protects your property from avoidable damage. Taking these steps in the week before crews arrive demonstrates respect for the work and helps contractors focus on quality installation rather than navigating obstacles.
Call 811 several days early if your project involves any utility modifications, even if you think roof work won’t affect underground lines. This free service marks utility locations and protects you from liability if workers accidentally strike infrastructure. While roof replacements rarely involve digging, service upgrades or solar installations that coincide with roofing do require this clearance.
Trim overhanging tree branches that might interfere with ladder placement or debris removal. Branches within 6 feet of the roof line pose hazards to workers and can snag shingles during installation. This grooming also improves roof longevity by reducing moisture retention and limiting pathways for squirrels or raccoons to access your attic.
Confirm your roof’s pitch and drainage patterns meet code requirements before crews arrive. While contractors verify this during estimates, double-checking prevents surprises during tear-off when hidden issues emerge. Ask specifically about ice dam prevention measures required in your municipality, since these vary across CT and NY jurisdictions. Being informed about your home’s specific needs helps you evaluate contractor recommendations and understand what’s mandatory versus optional.
Move outdoor furniture, grills, and decorations at least 15 feet from the house perimeter. Falling debris and material staging require clear zones that extend beyond the roof’s footprint. Delicate plants directly under eaves may need temporary protective coverings, though most contractors provide these as part of their site prep. Discuss specific concerns about landscaping features with your contractor during the pre-work meeting.
Frequently Asked Questions About New Roof Installation
Q: What is the typical new roof installation process from start to finish?
A: The process begins with permit acquisition and site preparation, followed by tear-off of existing materials down to the deck. Crews inspect and repair the deck as needed, then install underlayment, flashing, and new shingles in that order. Ridge vents and final sealing complete the work before cleanup and inspection. Most residential projects take 1-3 days of active installation after permits are approved.
Q: How long does roof tear-off take and what should I expect?
A: Tear-off typically takes 4-8 hours for an average single-family home, with debris contained in driveway-staged dumpsters. You’ll hear scraping sounds as crews remove old shingles and nails. The deck gets exposed section by section, but teams work quickly to minimize open exposure time. Expect noise and visible activity throughout this phase, though disruption is concentrated rather than spread over days.
Q: Are permits required for new roof installation in Connecticut and New York?
A: Yes, building permits are required in Connecticut for roof replacements, and New York follows similar uniform code requirements. Permits verify work meets current structural, fire, and energy codes. Additional wetland permits may be needed for properties on sloped lots near protected water bodies. Processing takes several days to two weeks, so contractors typically file well before scheduling installation crews.
Q: What should I expect to happen on installation day one?
A: Day 1 starts with dumpster delivery and site protection setup, followed by systematic tear-off of existing roofing materials. Crews work section by section, inspecting the exposed deck for damage and making necessary repairs. You’ll experience significant noise from material removal hitting the dumpster and crew coordination. By day’s end, your home should have temporary weather protection in place even if full installation isn’t complete, preventing exposure concerns overnight.
Q: How can I minimize yard disruption during my roofing project?
A: Request that contractors stage materials and dumpsters on driveways rather than lawns when possible. Ask crews to use plywood pathways when crossing grass with wheelbarrows or equipment. Schedule daily debris removal rather than allowing accumulation. After completion, overseed any compacted areas with appropriate grass types for quick recovery. Most disruption concentrates in access paths and resolves within days after final cleanup sweeps remove stray nails and debris.
Final Thoughts
Connecticut and New York roofing teams have refined installation processes that address regional challenges while delivering predictable 1-3 day completions. Understanding the sequence from permits through final sweeps helps homeowners prepare for the brief but intensive work period without excessive worry about yard damage or prolonged disruption. Your property deserves protection from both weather and the installation process itself, which is why professional contractors follow established protocols for staging, debris containment, and rapid restoration.
The same attention to property care that roofing professionals demonstrate applies to other outdoor concerns you might face. If your beautiful new roof looks down on a lawn plagued by Canada geese leaving droppings and damaging grass, Tri-State Geese Patrol offers humane, effective solutions. With over 11 years of experience managing goose populations across the Tri-State area, our professionally trained Border Collies provide safe, environmentally-friendly control that respects wildlife while protecting your property. Our teams work around your schedule, just like quality roofing contractors, ensuring minimal disruption while solving persistent problems. Contact Tri-State Geese Patrol today to learn how our canine experts can restore your yard’s usability and appearance after your roof project is complete.